


Blog post to perfection, learn how to create the perfect blog post with this step-by-step guide.
With the help of this step-by-step guide, you will soon become a master blogger of supreme SEO goodness. The first two stages I have created are for those who just want to get started in blogging and the stages after that are for those who want to take their blog posts that step further and make them super-powered to boost traffic to your website.
Ensure the basic WordPress blog post features are set up correctly
First of all, before we even begin to consider creating beautiful blog posts you should make a few basic configurations that will help a great deal in improving the performance of your site.
This first step should take you around ten minutes but once its set up correctly you will never likely need to change these settings again.
WordPress blog post spam prevention tool Akismet
Step1a – Activate Akismet plugin
this plugin is one that comes pre-installed with WordPress. The reason for this is that as you build a fantastic blog it is quite common to receive spam comments from ‘bots’ looking for dodgy backlinks.
Akismet takes just a moment to set up and just requires a valid email address and it will generate what is called an API key ( similar to a password ) that will be sent to your email address. This will enable your website to block many of the bots from commenting on your blog posts but alas, one or two bots will still get through.
Step1b – Configure permalinks
A permalink, to the none techies, is that thing in the address bar, sometimes known as a URL or web address. It is really important that you configure these as WordPress automatically sets up a permalink for new blog posts something like this – yourwebsite.com/p=001.
This is very bad practice to keep your permalink set to default, it is not easy to type in for users and has no use for gaining high positions organically in the search engines. A good web address is known as semantic URLs, find out more about semantic urls in detail on Wikipedia
To set up permalinks do the following: – go to settings > permalinks in the sidebar of the dashboard.
Then in the box put the following code %category / %postname% / . This will allow the WordPress CMS to create a pretty permalink that is both easy to type and can contain your top chosen keyword, such as blog post or guest post service
Step 1c – Add a Gravatar – Gravatar? Sound a bit familiar with the successful film ‘Avatar’? Well, there is a relation actually.
A Gravatar is an avatar that adds an image to associate your author profile with your email address so every time you comment on your blog or on someone else’s wall more often than not your image will appear next to your blog comment. This is great for allowing people to start to recognise you as you take part in the global blog-o-sphere.
The best thing about Gravatar is that once you have set it up you won’t need to do it again ( unless, of course, you want to change your image).
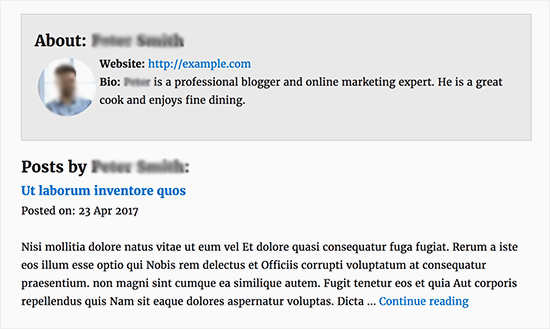
Step 1d – Add an author profile for the perfect blog post
Lastly, it is a great practice to put an author profile in place so people who read or view your content can find out a little bit more about you next to your Gravatar image. See the bottom of the page for my own author profile and if you are looking for ideas of what to include check out some other blogs.
Step1e – Add WordPress SEO by Yoast – This plugin is a MUST for all WordPress owners. It is probably the very best SEO plugin on the WordPress market and is regularly updated. This plugin will give you three lights, red, amber and green which indicate how well your SEO is performing before you publish your draft live. If you want a breakdown of how to improve your SEO of the post further you can get a ‘page analysis’ which is a breakdown of how to make your blog post better for search engines.
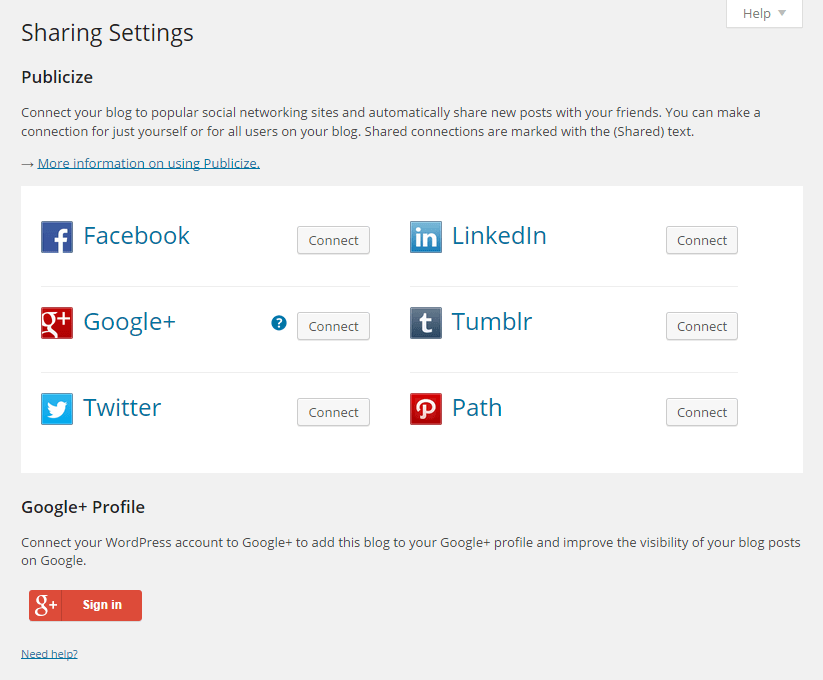
Step1f -Jetpack Publicize
Who is going to read your blog post if you don’t share it with the rest of the world? A perfect WordPress blog post should be shared and WordPress has made this easy with a tool in the Jetpack called ‘Publicize’. You can link your WordPress website to all the major social media channels such as Twitter, Facebook, Google+ and LinkedIn. To have this feature simply ensure the Jetpack plugin is installed and activated and then go to settings > publicize and follow the instructions to link your WordPress to your social media channels.
Creating a basic blog post
Now we have the basics in place let’s get down to the fun business of creating a blog post.
Plan it out
Audience – Your audience should be at the forefront of your mind BEFORE you consider writing anything. Envision your target market in your mind or if you prefer create a person persona of how you imagine your readers to look and their personality traits. There are plenty of persona templates to start with on the web, you don’t necessarily need one but if it helps you envision your target market it may well be worth the time doing.
Problems – Everyone has problems and as fellow human beings it is our duty to help each other solve difficulties. Think about what problems you are going to solve with your blog post, is it answering a question that a person has? What would your problem be if you were your customer? What has been a regular question asked to you? Can you answer them? Write down 20 problems and you’ll find topics for blogs that will generate traffic and get you in the mode of creating regular blog posts. It’ll come naturally after you’ve done a few.
Solutions – Now you know their problem, create the solution. Don’t be afraid to give away free knowledge it shows you care about your audience, shows you are a fountain of knowledge and also, most importantly, helps build trust with potential clients and fellow industry experts.
Now you know who to target and what to write about let’s target some keywords.
Keyword – What is a keyword? A keyword is a word that search engines will index your content around. Although a keyword implies it is a single word you can use a keyphrase as your main keyword so consider for example “how to make a sponge cake” as a keyword for a baking article rather than just “sponge cake”. Actually, the more specific you are the easier it is for the major search engines to index you and help you get found.
WordPress SEO by Yoast – Once you have your keyword put it into your new plugin that rests at the foot of the post, it will then guide you with red yellow orange and green lights to let you know how to improve your page ranking. For more information see WordPress SEO by Yoast.
Finally, let’s build the perfect blog post
To get started creating your first WordPress post, locate the Posts menu in the left-hand side of the WordPress Dashboard. You can either hover over the link or click to expand it to reveal the submenu.
The Add New Posts page can also be found from the + New link in the WordPress Admin Bar.
Now you’ll see the Add New Post page which is your blank canvas enabling you to create your first post.
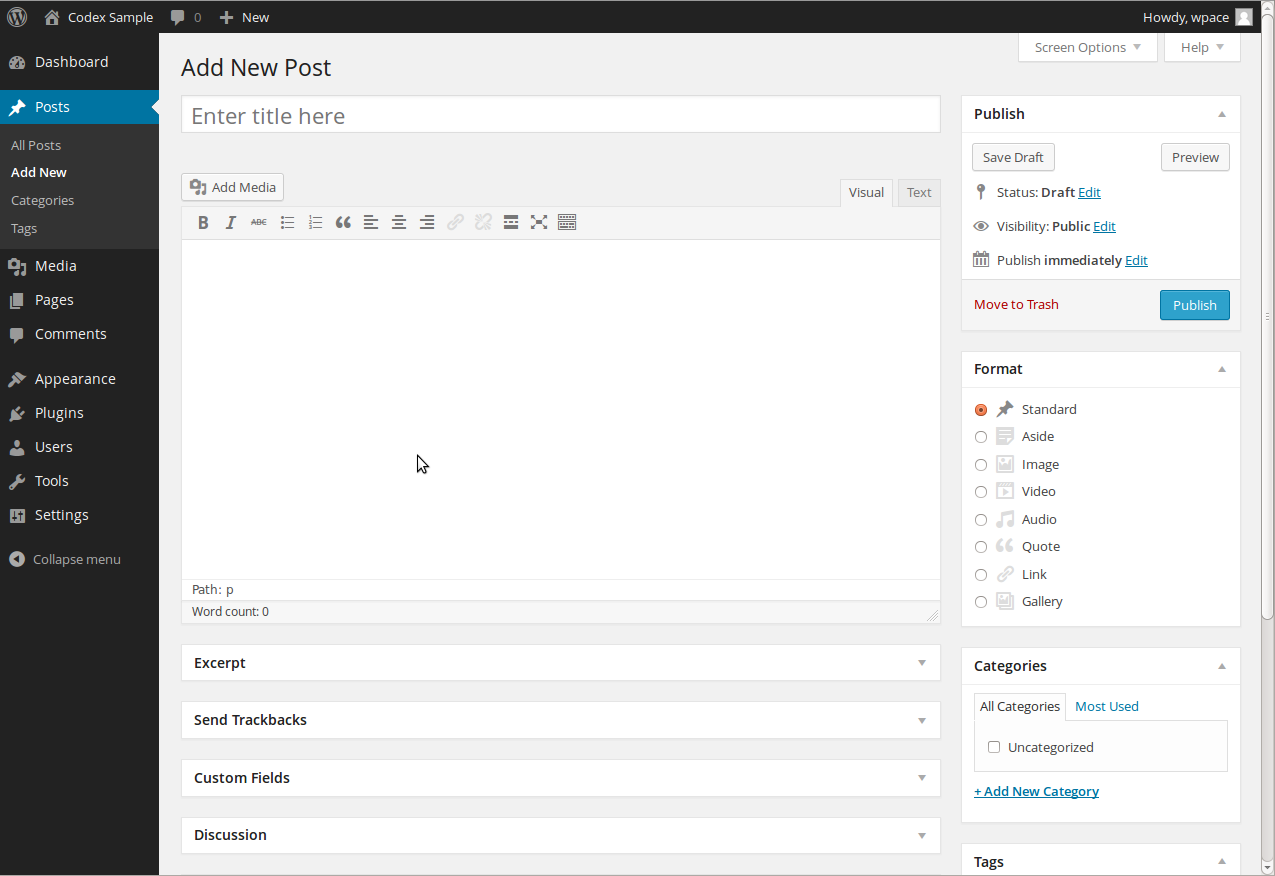
1. The first box is where you’ll want to enter the title of your post, try to put your chosen keyword at the very start of the post, it’ll help your organic search results.
2. Next is the Post formatting section or post editor. This is where you’ll actually type the content of your post. If you look on the right side of the box, you’ll see two tabs. There are two modes of editing blog posts: Visual and Text. Visual is much like a word processor for those with little HTML knowledge and text allows you to enter HTML coding in a plain-text editor instead for the more advanced web user. Don’t feel intimidated just use a visual editor if it suits you best.
3. At the top of the right column on this screen you’ll see the Publish box. Here, your can save your post as a draft, useful if you don’t feel you need to come back to it at a later date rather than publish a half-finished blog post. If you click the Preview button, you can get a preview of how the post will look once it’s published. The Status of the post will show if the post has been published, saved as a draft, if it’s pending review or if it’s been scheduled for a specific time and date, to schedule it simply select the option and set the correct date and time.
4. The next section is for categories and tags assigned to your WordPress post. You can add a category topic here so for instance if you have written say..about how to create a blog post may be a good category you could create would be either web design or WordPress? This helps visitors find information about particular topics they are interested in. At the end of the day, what you create is all about your visitors and users.
The tags have two benefits, firstly, it helps the user find another blog post related to particular keywords and it is also believed can help in indexing your content to search engines.
5. If you still need more help while you’re on the Add New Posts page, just click the Help tab in the upper right corner. From here, you’ll be able to get a reminder on how to customize your post display, tips for adding a post title and using the post editor and inserting media and settings for publishing and discussion.
6. To add images and other media such as pdfs click this button. It will give you an option to upload the file. It is recommended to add an alt tag here. An alt tag is for accessibility so blind people can use the internet and understand what is displayed in an image. I recommend adding your keyword to images in the alt text but also make sure it is relevant so that you are not making the experience bad for blind or partially sighted users.
7. Adding a featured image is good practice to let people gain a good idea about what the blog post is about before they arrive at the page. Different themes have different requirements so either finds out what is the perfect pixel dimension or ask a designer to help you. If you need some imagery there are lots of ways and places to get free images. See this blog post I wrote about some ways to gain free images.
Create a Call to Action at the Bottom of a Perfect Blog Post
Lastly don’t forget to add a call to action at the bottom of a perfect blog post, for example, if this blog post was aimed at guest bloggers then I would ask people to contact me to suggest a post on the site. By the way…if you are interested in posting your content on my website please do contact me about guest blogging here.
Want to make your blog post AMAZE-BALLS!? Read on young warrior…
Set Up Analytics to monitor your blog post’s success/fail rate

The most common tool that website owners use is Google Analytics as it provides many features to help monitor your website’s blog post’s success and who your target audience is and where they come from.
Guest blogging
Congratulations, when you create a blog post you create posts everyone wants to read and it will pay dividends in terms of generating traffic and interest in your content maybe it’s time to spread your wings and guest blog.
Although guest blogging has built quite a bad reputation lately because people are using it as a way to create backlinks and Google know it it is still a good way to generate interest in your own blog. A guest blog can help the blog you create for in generating new content but it can also help you get new visitors and fans to your own products and services. For instance, I had a guest blog about Canva, the graphic design tool that has built a huge fan base. ( I still seek guest blogs so if you are interested in posting a blog here please contact me).
A tool to find where and who to guest blog on is myguestblog.com ( no longer available ). Myguestblog.com do have a plugin for WordPress to but I don’t recommend it due to its slow loading speed which impact the usability of your site. This website is developed to allow people who want to guest blog on other’s blogs and you can also register your own website for use as a place to guest blog.
Beware of the do-follow guest blogging links
Although guest blogging is fantastic to help generate new fans of content with the new Google Penguin you have to beware of do-follow links. A lot of people have been abusing the guest blog by accepting irrelevant blogs to their website just for the sake of free content. This, in Google’s eyes, is basically spam and makes your website look untrustworthy. So when you create guest blogging posts remember, to ask for nofollow links which won’t affect your SEO ranking but will help people find your website on ‘relevant’ websites to your own.
Conclusion on how to create the perfect blog post
I hope you found this blog post about blog posts useful. If you need any further clarification please leave a comment below or if you have your own tips that I may have missed please feel free to let me know. Best of luck blogging and I hope you enjoy it as much as I have.