


I recently acquired some freelance work via Twitter from across the Atlantic where a Philadephia up and comping rapper required a digital painting for his new album. It was the first time I had really considered using Photoshop for digital painting and I knew how difficult painting faces can be using normal acrylics or oils but always up for a challenge and with nothing to lose I gladly accepted the challenge and began discussing the design brief that Max required.
Conversing over Twitter
Being in different countries and a few thousand miles apart separated by an ocean communicating through Twitter and email was a breeze. Max knew exactly the style of album cover he wanted, he had a vision and he explained to me what it was.
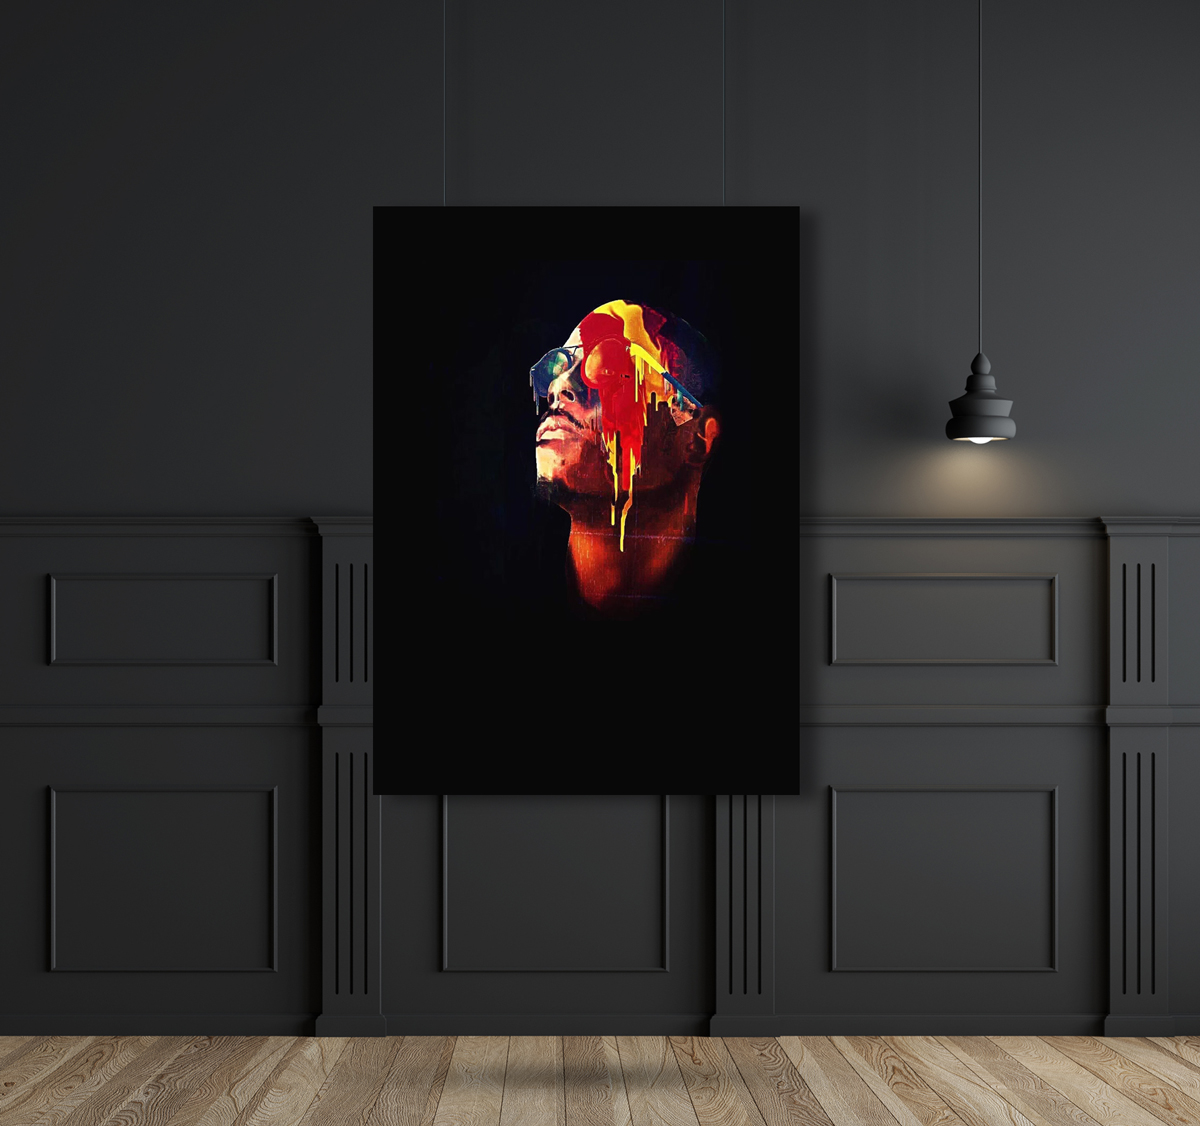
Max wanted a digital painting of himself with paint dripping from his face within a golden frame to represent his freedom of expression. It all sounded like a great idea but I was still wondering whether I would have the capability or not to meet the standard I wanted to create and that was expected by the client but I suggested it was possible and asked the client for some photographs to work from.
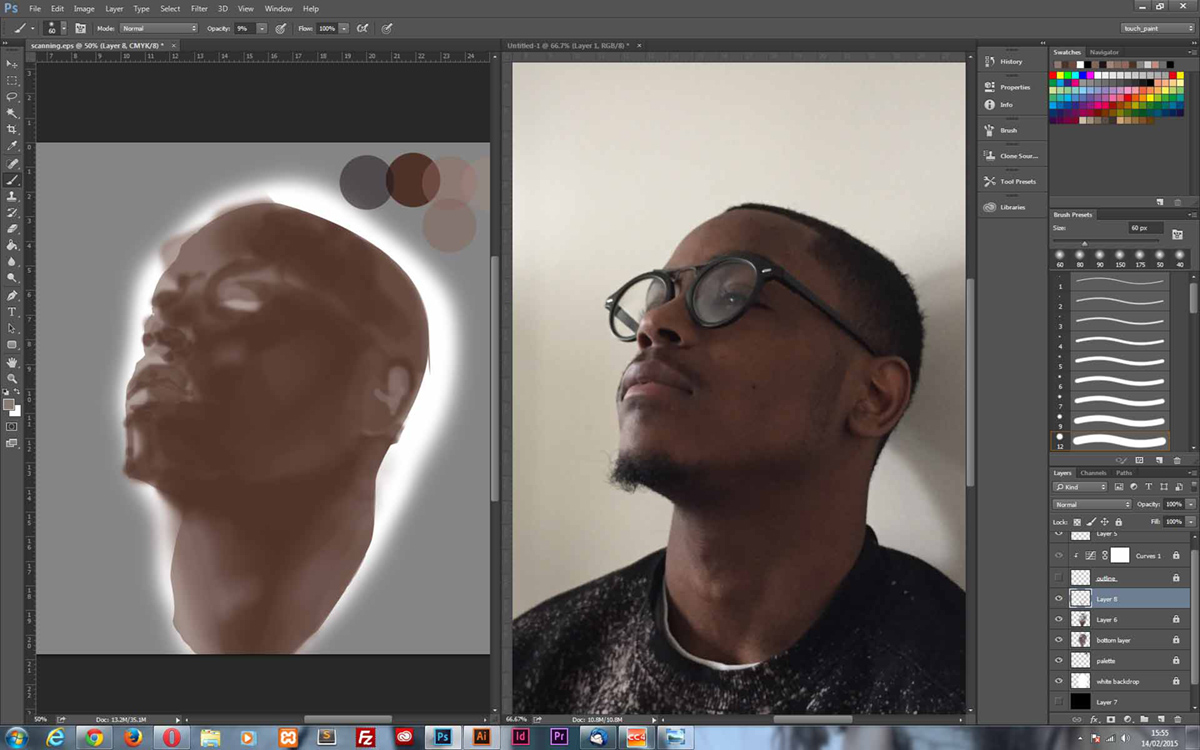
I started creating the image from the left perspective, sketching out the face of the artist and then scanning that into the pc to have a basic layer to work with. I then started experimenting with the brush tool but it wasn’t quite the look the client was looking for so asked if I could draw the other side of his face of which I accepted, I had learnt the first bit from my first experiment with the paintbrush tool.
Repeated the Digital Painting Process
So again I started by sketching out the face of the musician and scanned it into the PC. I then opened up the original photograph and began by creating a palette of colours from the original picture.
I felt that the first stage of creating the digital picture was to get the face proportions, light and shades of the original image as close as possible so began by applying a light wash over the drawing, to begin with and then adding the darker colours for the shade over the first layer ( see below).
As I built the skin tone of the image I then added more layers this time adding the eyes and some detail to the lips and nose to further enhance the 3d appearance of this part of the face ( see below).
Further to this, I began adding yet more layers creating the hair details, continuing to add shade and light where necessary and also developing the frame of the glasses ( see below).
As the image continue to progress I then added the facial hair and made the background dark as that was the wish of the artist to have a dark neutral background to enhance the colours of the paint that is yet to be added ( see below).
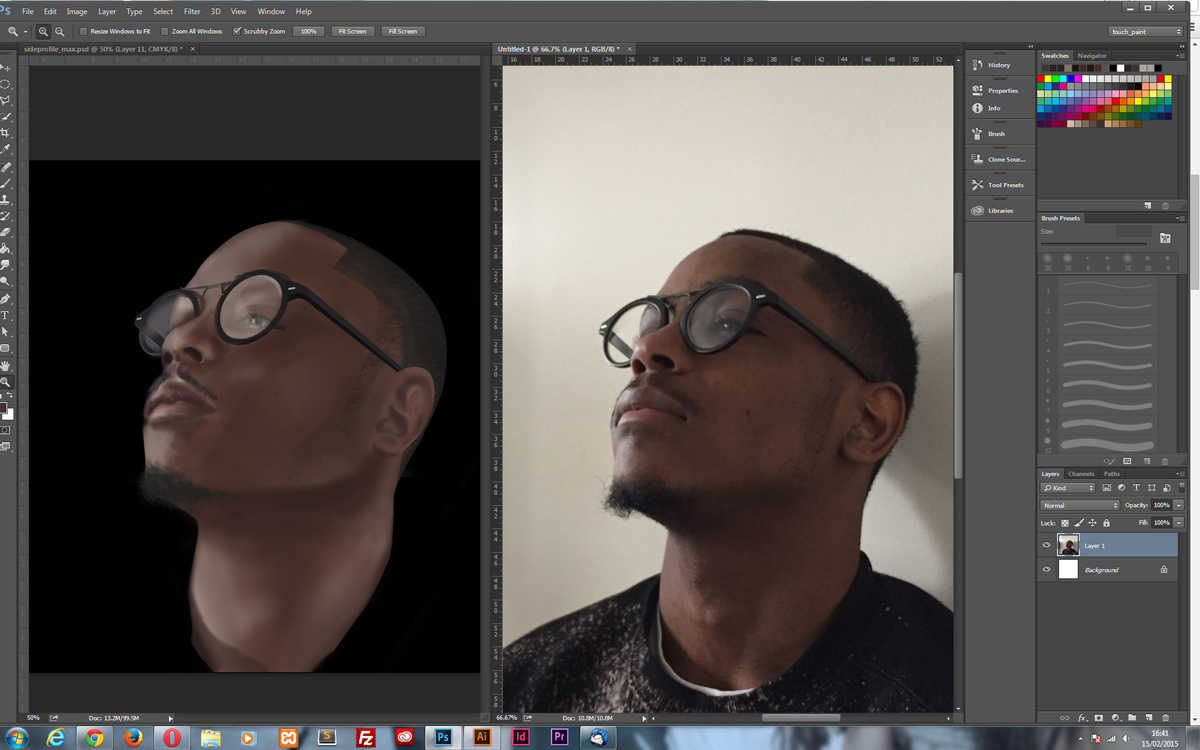
Once the facial hair had been added I began to add light and shade to the glasses to reflect something close to what was seen in the photograph and also the silver ‘bullets’ on either side of the frame. Ensuring not to miss any details.
Face in Place Time To Add Some Paint
Once I had created the face it was time to experiment with some paint drips and added colour. This stage was going to be more difficult as I had no reference point so relied totally on my imagination and how paint may react when dripping down a face…
Realising it looked odd that the glasses had no paint on them I added some more colour to the lenses which further enhanced the appearance of the paint drip.
I showed the client the image at this stage and he was happy with how it was progressing and so I began to ask about the frame. He explained that he wanted quite an ornate frame and golden in colour so I began to find a suitable image as inspiration and began to paint in the details. The resulting images can be seen below.
Adding Paint To The Frame
Once the frame was in place I then needed to add some dripping paint to it to make it look as though the paint was dripping from the face and onto the edge. This was the final stage of the painting and the results can be seen below.
At first, having paint at the top of the frame didn’t look right and the way I was applying the paint didn’t look real enough and so I tried adding more paint to the bottom of the frame and removed it from the top.
Adding paint to the top still didn’t look quite right at first, there was something still not quite right. I realised after a short time that there maybe was a little too much paint and so reduced the amount of drip on the frame to achieve the final design.
BlackArt Album Cover Conclusion
Working with Max was a good experience, working with him to come up with my first digital painting which happened to be a portrait, a challenging subject, actually turned out to be a very enjoyable piece of work and something I will definitely be pursuing to advance in my skills and ability.
Sometimes new challenges can be the best thing to keep your creativity flowing. If you need help with some digital artwork for your music or another project, you can view our digital graphic design service here.